Hey Guys,
This is a bit of a different one today, and doesn't feature me, but my boyfriend Andy who has his own blog where he has featured this too. In my post, I'll be talking step through step how I created a Zombie Halloween look, similar to that of the Walking Dead tv show. This is an easy and cheap makeup look!

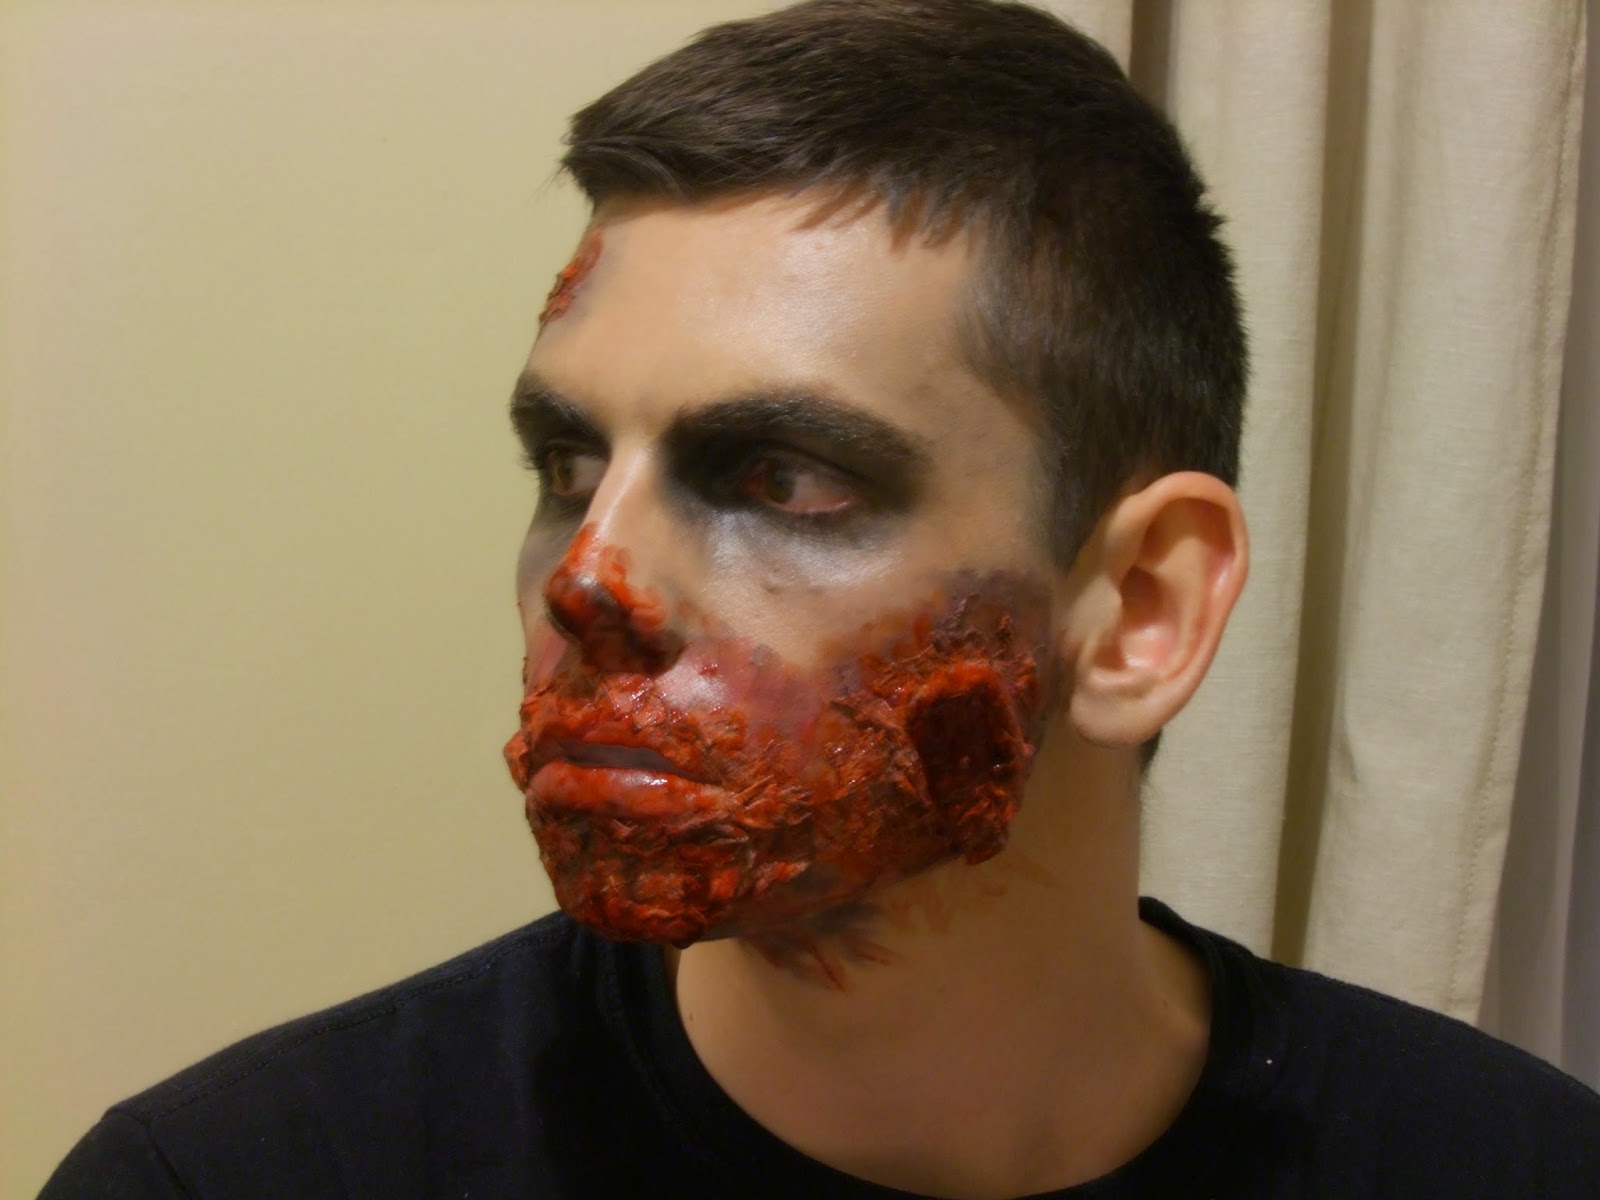
Firstly, if you have unruly brows like Andy, put Vaseline on them to stick them down. This is a lot calmer on the skin than using Pritt Stick or other glue, and will wash off easily afterwards. You then want to grab some eyelash glue and some tissues to make the 'wounds'. Stick some of the glue straight onto freshly cleaned skin, and scrunch up tiny pieces of tissue and stick them on. Make square/rectange type shapes to represent unusual wounds and mini ones (like on the forehead) for more of a 'deep scratch'. Apply glue over the tissue and apply more tissue and glue if needed. Wait for it to dry.

Secondly, apply a foundation to the skin. As you can see, Andy is paler than me so it doesn't match, but once you apply blood and everything later it doesn't really matter. Apply evenly, covering the tissue and eyebrows. Andy has close to black eyebrows so they didn't cover that well. Once dry, apply a powder to set the foundation. This can be a white powder or skin coloured, it's up to you how drastic you want the makeup to look.

On top of this, I began to add grey eyeshadow over the temples, nose and eyes. I then started to fill in Andy's eyes with black and grey eyeshadow to make them look more hollow, and his face look gaunt as this makeup look is supposed to represent the dead after all.

Add more and more black eyeshadow to the eyes in gradual stages to hollow out the eyes. I also added some to the cheekbones to make him look more 'dead', and to near the cuts. Zombies aren't clean yano, they need to look a bit dirty.
The next step (which I didn't photograph as I got a bit over-excited/scared) is to add black eyeshadow to the gaps in the wounds. Then go over this, and around the wounds with purple, bright red and dark red lipsticks. It creates a more realistic look of blood and flesh without using latex and tons of fake blood, which dries lighter. Here, I decided Andy wasn't zombie-enough so I added more tissue and glue to near his lips but not on his lips as I didn't want to damage them!

Then add the fake blood! This is where you can go crazy and add as much or as little as you wish. This genuinely creeped me out!